Look closely at a hand-painted tileset from a game you admire, and the craft is all at the edges. The grass does not stop at a clean line: individual blades lean over the boundary. Stone paths end in chipped, broken fragments. Dirt crumbles into clods and pebbles. That irregular, material-true silhouette is what makes terrain read as hand-made, and it is exactly the part that generated tilesets have always gotten wrong.
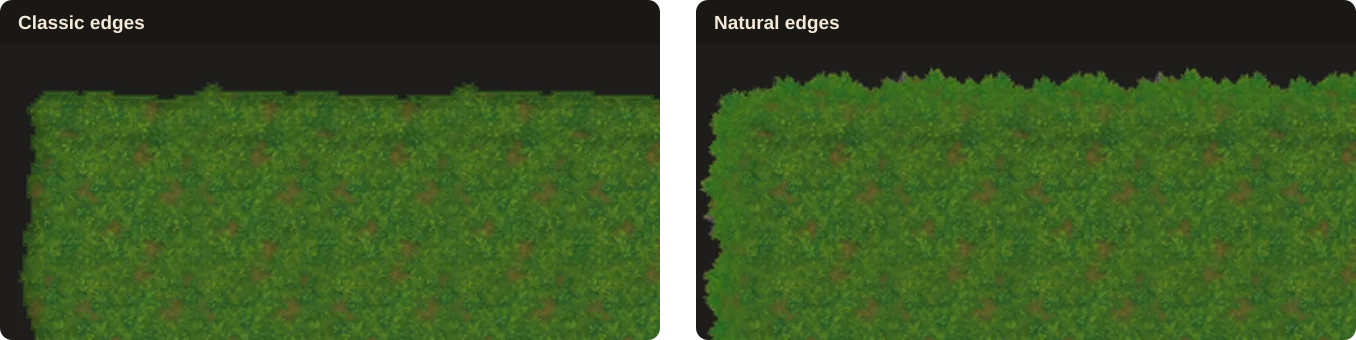
Tilewise now has a second edge style for its tileset generator. Alongside Classic (crisp, uniform edges) there is Natural: the edges themselves are painted artwork, with the overhangs, chips, and crumble of the real material. You still describe your material in plain text, and you still get a complete 47-tile blob tileset ready for Godot, Tiled, or Unity. The difference is what happens at every boundary.
Why Edges Make or Break a Tileset
Terrain fill is forgiving. A grass texture from almost any source looks like grass when it covers the middle of a field. The boundary is different: the player's eye follows silhouettes, and the contour where grass meets cave floor (or dirt, or nothing) is the most visible line in the scene.
Uniform edges give that line the same character on every tile. However good the texture inside, the terrain reads as stamped: the same clean cut repeated around every island and coastline. Hand-painted terrain looks alive because the edge behaves like the material it belongs to. Grass fringes. Stone fractures. Brick steps. Each boundary is a little different from its neighbors.
Until now, getting that meant painting it yourself, tile by tile, keeping all 47 tiles of a blob set consistent with each other. That is days of work per material, and it is the reason most generated or procedural tilesets settle for the clean cut.
What the Natural Edge Style Does
Pick Natural in the generator and the edge becomes painted art that follows your material:
- Grass: individual blades and small tufts overhang the boundary irregularly, like the fringe of a lawn meeting bare earth.
- Stone: the border is chipped and fractured. Individual stones jut out or sit loose right at the edge.
- Brick: whole and half bricks step in and out in clean rectangular steps, mortar lines crisp, the occasional brick missing. Architectural rather than wobbly.
- Dirt: the boundary crumbles. Small clods and pebbles gather at the edge, and thin cracks run inward.
- Wood: boards end at staggered lengths, a few of them splintered or broken along the grain.
You do not configure any of this. Describe your material the way you always would ("mossy stone, red brick, sandy dirt, dark crystal") and the edges behave accordingly.
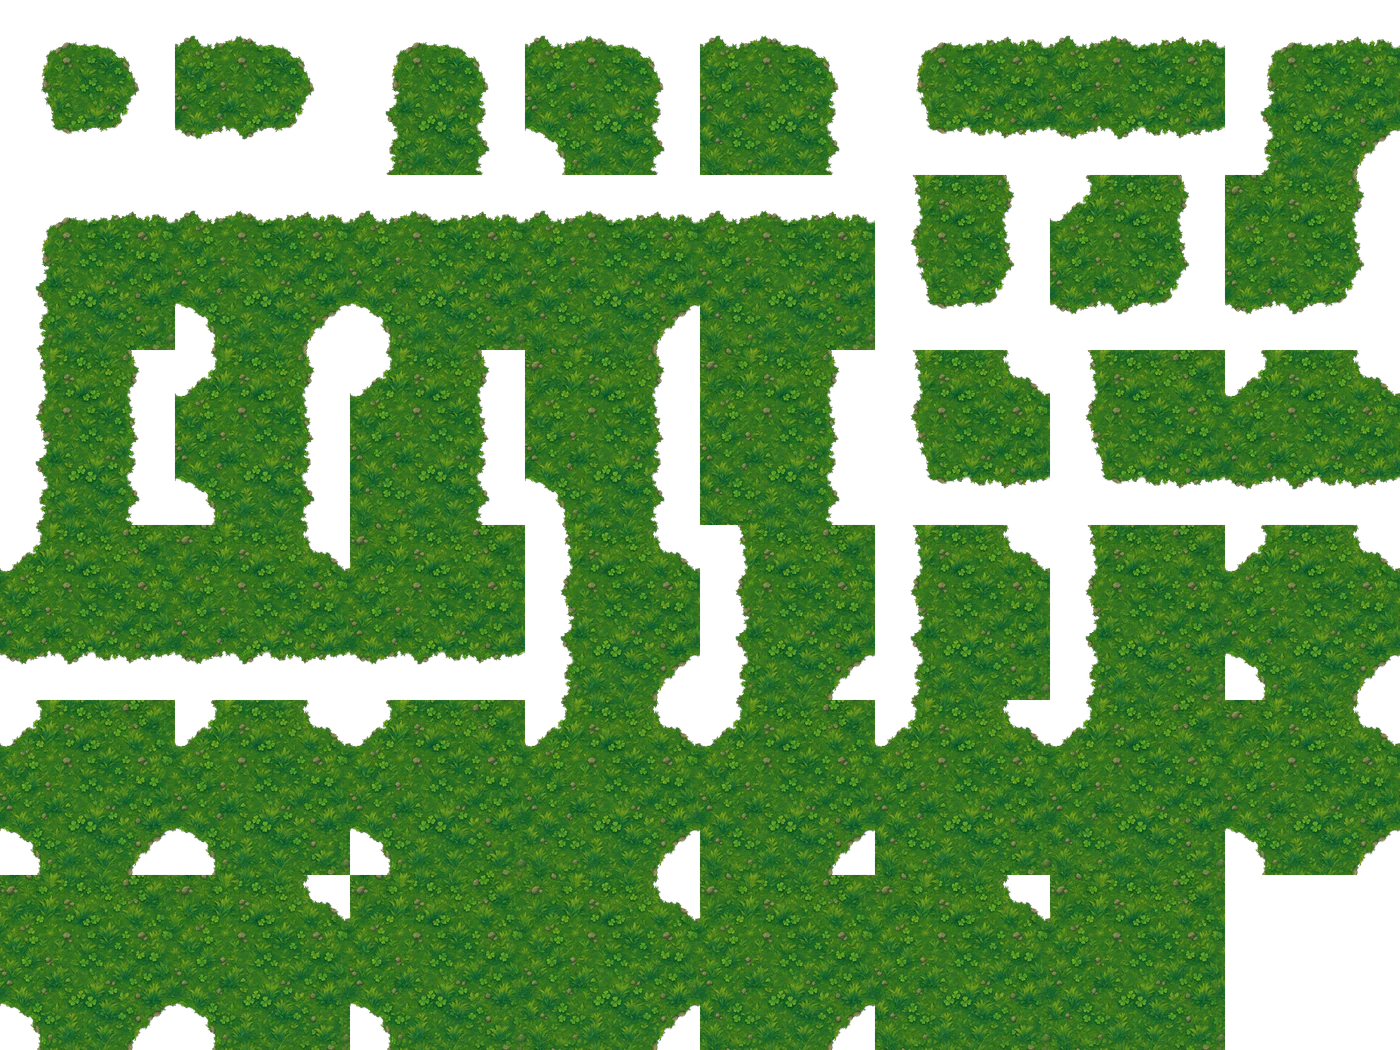
The output is still a standard 47-tile blob tileset: same layout, same engine-ready exports, same terrain painting in your engine. Everything in our blob tileset guide and the Godot autotile walkthrough applies unchanged. All 47 tiles come from the same painted source, so they fit together seamlessly when your engine autotiles them.
Step by Step: Generating a Hand-Painted Tileset
1. Create a Tileset Project
Create a new project in Tilewise and pick the tileset workflow (or switch an existing project into Tileset mode). Open the tileset generator.
2. Describe Your Material
Type a short description of the surface: "lush meadow grass with clover", "weathered granite flagstones", "packed desert earth with cracks". Materials with strong edge character (grass, stone, dirt, wood) show off the painted edges best. You can add a reference image if you want the tileset to match your existing art style.
3. Pick the Natural Edge Style
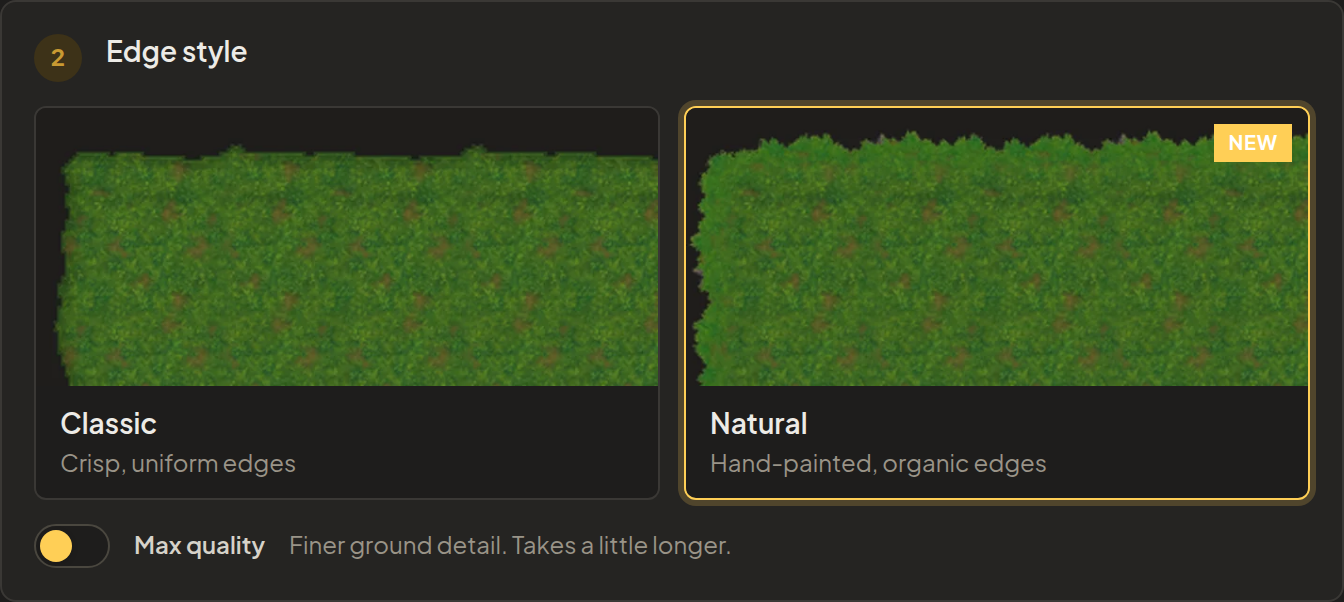
In the Edge style section, choose Natural ("Hand-painted, organic edges") instead of Classic ("Crisp, uniform edges").
4. Choose a Tile Size: 64px or Larger
Natural edges need room for the painted detail, so they are available at 64px, 128px, and 256px tile sizes. Individual grass blades and chipped stone fragments simply do not exist at 16px. If you are making small-scale pixel art, Classic remains the right choice (more on that below).
5. Generate
Hit Generate Tileset. A progress card appears right where your tileset will land, and walks through the steps: painting the ground texture, painting the natural edges, assembling your tileset. It usually takes a couple of minutes, a bit longer than a Classic generation, because the edges are being painted rather than cut.
A Natural generation costs 4 credits (Classic is 3).
6. Pick a Corner Style
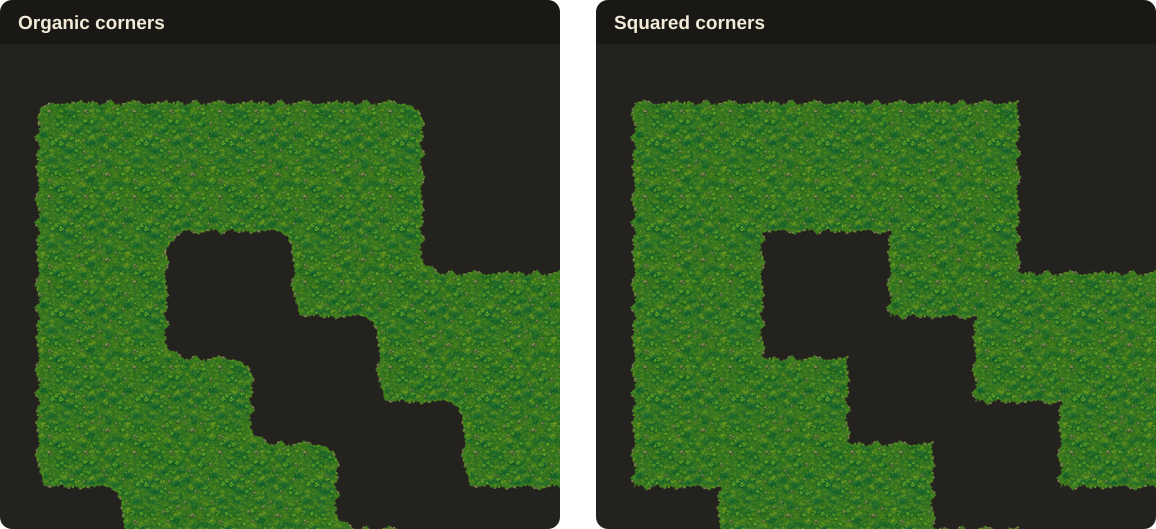
Natural tilesets have a Corners option with two looks: Organic (rounded, contour-following corners, the default for most materials) and Squared (mitred corners, the default for brick and crystal). You can switch between them anytime after generating, without repainting the edges.
7. Export
Export works exactly as it does for every Tilewise tileset: Godot .tres with terrain bits pre-configured, Tiled .tsx/.tsj Wang sets, JSON metadata for Unity or custom engines, and PNG spritesheets or individual tiles.
Here is the tileset from this walkthrough dropped into Godot 4 as a .tres and painted with the terrain tool. Every stroke autocompletes with painted edges:
Already Have a Tileset? Upgrade It
If you have a Classic tileset you like (64px or larger), you do not need to start over. Open the Restyle panel in the tileset editor and hit Upgrade to Natural edges. Tilewise repaints the edges of your existing material for the same 4 credits, and the upgraded tileset replaces the active one in place.
Max Quality
Pro subscribers get an extra Max quality switch on Natural generations. It produces finer ground detail and takes a few minutes instead of a couple, at 6 credits per generation. For hero terrain in a painterly game at 256px, it is worth the wait.
Classic or Natural: Which Should You Use?
Both edge styles produce the same 47-tile blob format, so this is purely an art direction call.
Choose Classic when:
- You are working at 16px or 32px tile sizes (classic pixel art)
- You want crisp, uniform edges as a deliberate style
- You want to experiment freely: Classic lets you swap between six material edge profiles (stone, dirt, brick, wood, crystal, grass) after generating, at no cost
- Speed matters: Classic generations finish in well under a minute
Choose Natural when:
- Your game has a painterly, hand-drawn, or high-definition art style
- You are working at 64px or larger
- The terrain silhouette is prominent in your game: islands, coastlines, cave systems, anywhere the player sees a lot of boundary
One difference worth knowing: with Natural, the edge art is part of the painting, so there is no profile-swapping afterwards (you can still switch corner styles and tile sizes). Color variants and seam healing both work on Natural tilesets, and recolors keep the painted edges in the new palette.
Tips for Better Hand-Painted Edges
Describe the surface, not a scene. As with all tileset generation, "weathered granite flagstones" beats "a stone path through a forest". The edge painting follows the material you name.
Lean into materials with edge personality. Grass, dirt, and rough stone produce the most dramatic overhangs and crumble. Smooth or artificial materials produce subtler edges by design (brick deliberately keeps clean, stepped lines).
Use a reference for style matching. If your game already has an art style, add a reference image. The tileset (edges included) will follow its palette and rendering.
Try 256px for showcase terrain. The painted edge detail scales with tile size. At 256px with Max quality, individual pebbles and grass blades are clearly readable. You can always downscale on export.
Get Started
The Natural edge style is live for everyone now. Signing up gives you free credits, enough to generate your first hand-painted tileset and paint some terrain with it. Try it here, or read the blob tileset guide first if you are new to autotiling.