Seamless textures are the foundation of every tile-based game. Whether you're building a top-down RPG, a side-scrolling platformer, or an isometric strategy game, your ground, walls, and terrain all depend on textures that tile without visible seams. And if you need autotile or Wang tile sets for smooth terrain transitions, the workload multiplies — each base texture needs up to 16 edge-matched variants.
The problem? Creating seamless textures by hand is tedious, technical, and time-consuming.
The Challenge of Seamless Tiling
A seamless texture must match perfectly at every edge. When a 2D engine repeats the tile across a grid, the left edge has to blend into the right, and the top into the bottom. Any mismatch — a broken rock pattern, a color shift, an interrupted line — and the repetition becomes obvious.
Traditional approaches to solving this include:
- Photoshop offset trick — shift the image by half, paint over the seam, repeat. Works but slow and requires painting skill.
- Substance Designer — node-based procedural textures. Powerful but steep learning curve and expensive for hobbyists.
- GIMP seamless filter — automated but produces blurry, low-quality results on complex textures.
- Manual photo tiling — photograph a real surface, crop, and manually fix edges. Time-intensive for each texture.
All of these require texture design experience. For indie developers and small studios who'd rather spend time building gameplay, texture creation becomes a bottleneck.
The AI Approach
AI image generation changes this equation. Instead of pixel-level manual work, you describe the texture you want in plain language — and the AI generates it. But raw AI output isn't seamless by default. The edges still won't match. And a general-purpose image generator like Midjourney or DALL-E won't produce autotile sets or game-engine metadata — you'd get a nice-looking image that still needs manual seam fixing, manual edge-variant painting, and manual export configuration before it's usable in-engine.
What's needed is a pipeline purpose-built for game textures: AI generation, automatic seam detection, algorithmic seam healing, and direct export to the formats your engine expects. That's what Tilewise does. Every texture runs through seam validation and competing healing algorithms before you ever see it, and export includes ready-to-import files for Godot, Tiled, and Unity — not just a PNG.
Step-by-Step: Creating a Seamless Texture in Tilewise
Here's how to go from idea to game-ready texture in under a minute.
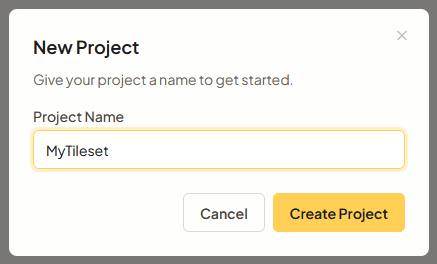
1. Start a New Project
Create a new project in Tilewise and give it a name. Each project stores its own textures, hero tiles, reference images, and export settings.
2. Describe Your Texture
Type a text prompt describing the texture you want. Be specific about the material, style, and visual details:
- Good: "Weathered cobblestone path with moss growing between the cracks, hand-painted MOBA style"
- Too vague: "Stone floor"
The more detail you provide, the closer the result matches your vision. Include the art style (realistic, pixel art, hand-painted, etc.) for best results.
3. Add Reference Images (Optional)
Upload up to two reference images to guide the style. References are powerful when you want the AI to match a specific color palette, material look, or artistic style from your existing game assets.
You can combine references with a text prompt for maximum control — for example, a reference showing the color palette you want plus a prompt describing the specific material.
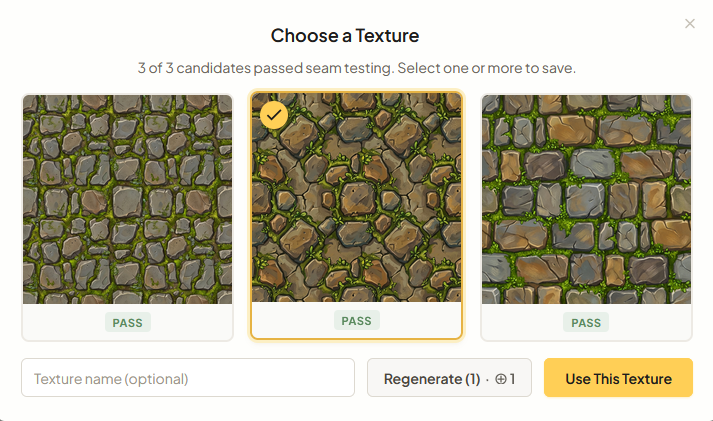
4. Generate and Choose
Tilewise generates 3 parallel candidates. Each one is automatically seam-tested at the edges — candidates that pass get a green checkmark, those that fail are flagged and healed. Pick the candidate you like best. If none of them are right, adjust your prompt or references and regenerate.
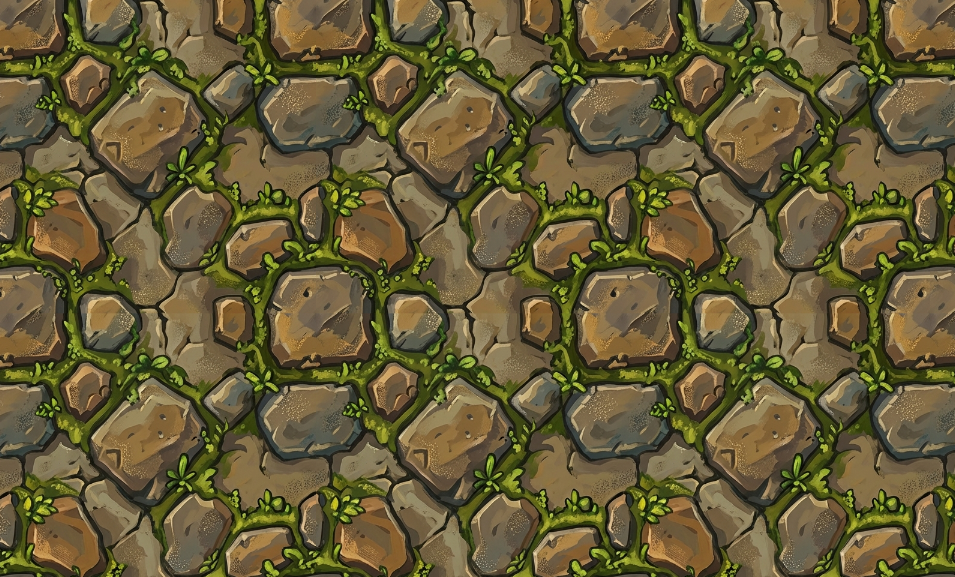
5. Preview Tiled
Switch to texture preview mode to see your texture tiled across a larger area. You can zoom from 0.25x to 5x to check how the texture looks at different scales — catching any patterns that become obvious at certain zoom levels.
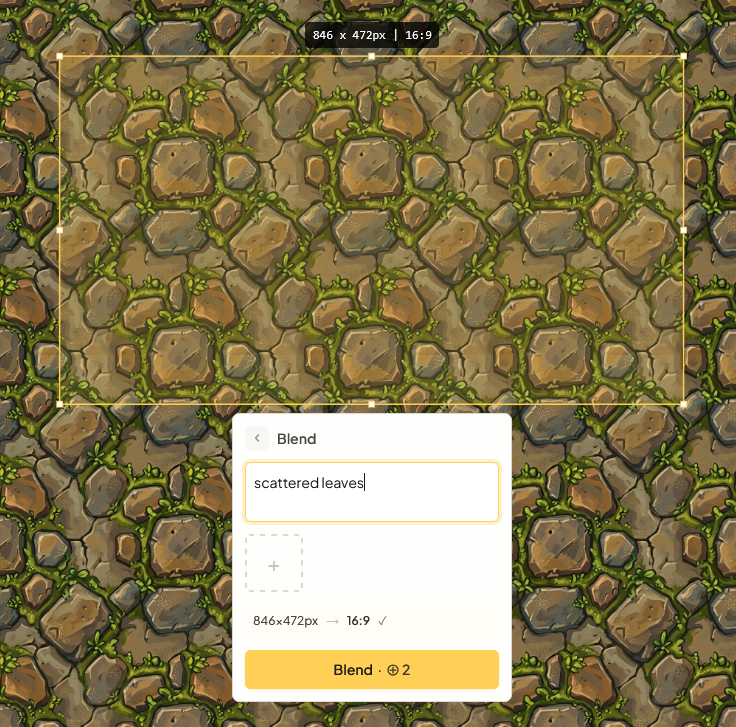
6. Build Your Tileset
With the base texture locked in, use the grid editor to place hero tile features — larger detail elements like rocks, tree stumps, treasure chests, or scattered leaves that make your levels visually interesting.
You can also generate complete autotile and Wang tile sets directly from your base texture — Tilewise produces all 16 tile variants automatically, so your terrain transitions (grass-to-dirt, stone-to-sand) just work in-engine without manual edge matching. Preview the results instantly with interactive paint mode before committing.
7. Export to Your Engine
This is where Tilewise saves you the most time compared to general-purpose image generators. Instead of exporting a flat PNG and manually configuring your tileset in-engine, Tilewise produces ready-to-import files with all the metadata your engine needs:
- Godot:
.tresfiles with terrain bits already configured — drop into your TileMap and start painting. No manual autotile setup. - Tiled:
.tsxtileset files with Wang set rules defined — open in the Tiled map editor and go. - Unity / other engines: PNG spritesheets with JSON metadata describing tile layout, so you can automate import with a simple script.
You can export base textures, hero tile collections, full 16-tile autotile sets, and composed spritesheets — whatever your pipeline needs.

Tips for Better AI Textures
Prompt specificity matters. "Dark cave stone wall with crystalline mineral veins, lit from above, fantasy dungeon style" will consistently outperform "cave wall." Include material, lighting, and style.
Use references for consistency. If you're generating multiple textures for the same game, upload a reference from your first successful texture when generating the next one. This keeps the art style cohesive across your entire tileset library.
Check at multiple scales. A texture might look perfect at 1x but reveal repeating patterns at 0.5x when you can see more tiles at once. Always preview at a few different zoom levels before committing.
Iterate quickly. AI generation is fast — don't spend time trying to craft the perfect prompt on the first try. Generate, evaluate, adjust, regenerate. Three iterations usually gets you to a result you're happy with.
Get Started
Tilewise gives you free credits to try it out — enough to generate several textures and see the full workflow. If you're spending hours on texture work that could take minutes, start creating free.